Creating an Account
Step 1
Click Register an account.

step 2
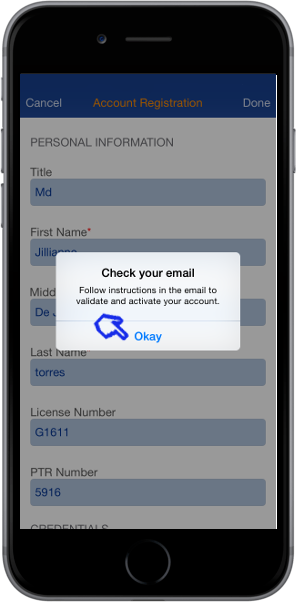
Fill out the account registration form and click Done. Click Okay and check your email for confirmation.

step 3
You will receive an email confirming your registration. Just click on the activation link to activate your account
After clicking the activation link you will receive a confirmation that your account is already activated.


step 4
Enter your email address and password and click on [Activate my account] to bind your user ID to the mobile device.

Step 5
After your account is successfully activated, click on [login].
Type your password and click [ IN ].


Step 6
Welcome to DRnotes! You can now use our App.
To add a new patient tap on the [+] button.

Creating an Account
Adding Patient and Location
Adding Patient’s Note
Creating SOAP Note
Creating Charge Capture Note
Creating Diagnostics Note
Creating Freeform Note
Creating Discharge Summary
My Favorites
Others
Adding Patients and Location
Step 1
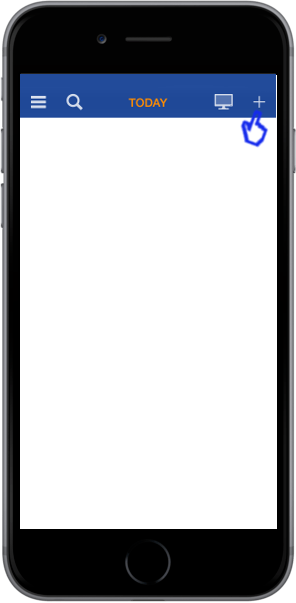
Tap on the [+] to add Patient.
Step 2
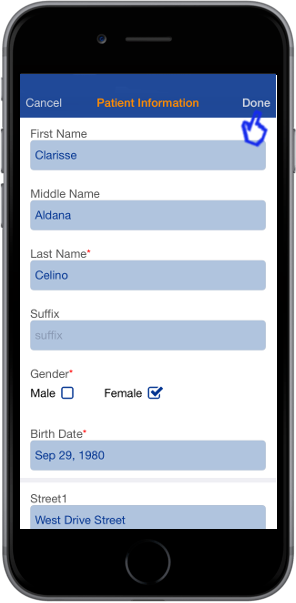
Fill out the Patient Information form and tap [Done].
Step 3
You can tap on [ Edit ] if you need to edit the patient’s information or tap the [Start Care] to add care Information about the Patient.
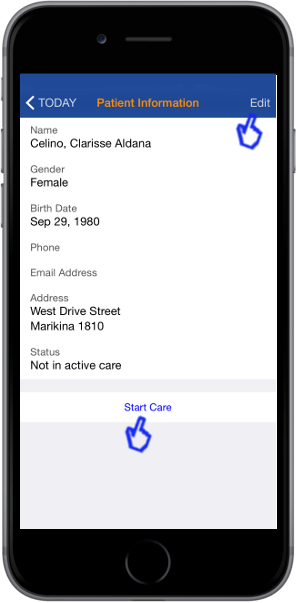
Step 4
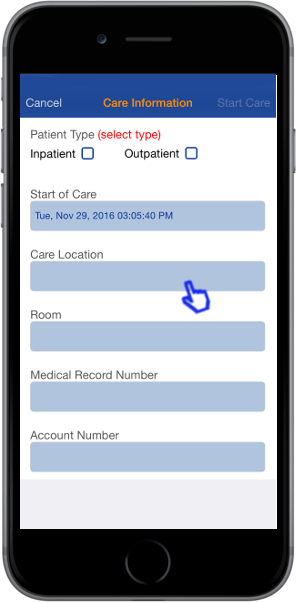
Fill out the patient’s care information.
Tap on the Care Location bar. Then tap on the [ + ] button to add care location.
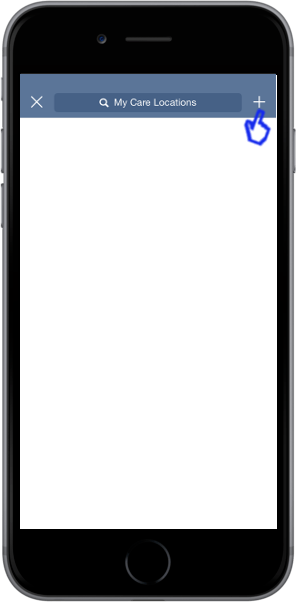
Type in the name of the care location and you can also add a short description. Then tap [ Done ].
Continue to fill out the Care Information then tap [Start Care].

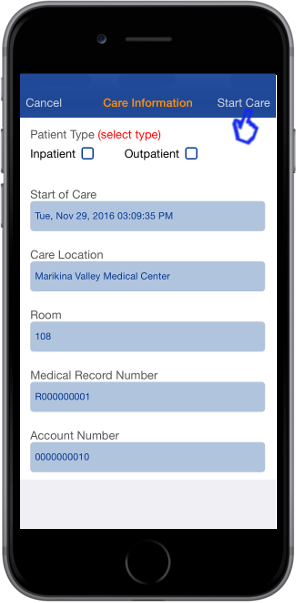
Step 5
You have now added your first patient. To continue adding patient’s notes, just tap on the [ + ].
Adding Patient’s Note
Step 1
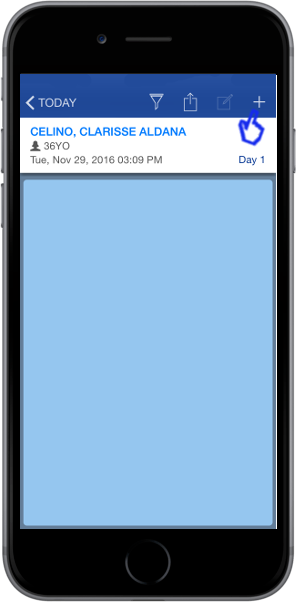
To add patient’s note, tap on the [+] and click History and Physical Exam Note.
Step 2
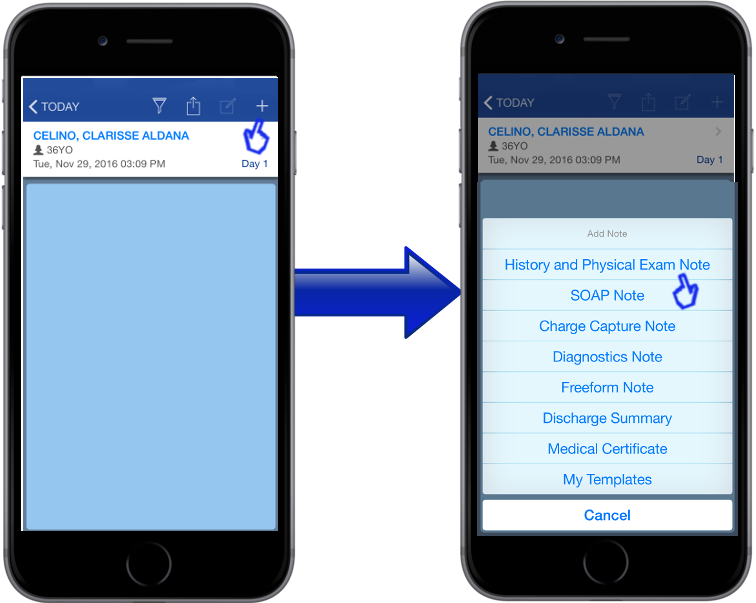
To add notes tap on the [ + Add entry ]. You can add Text note or voice memo. you can also take or import photo.
Step 3
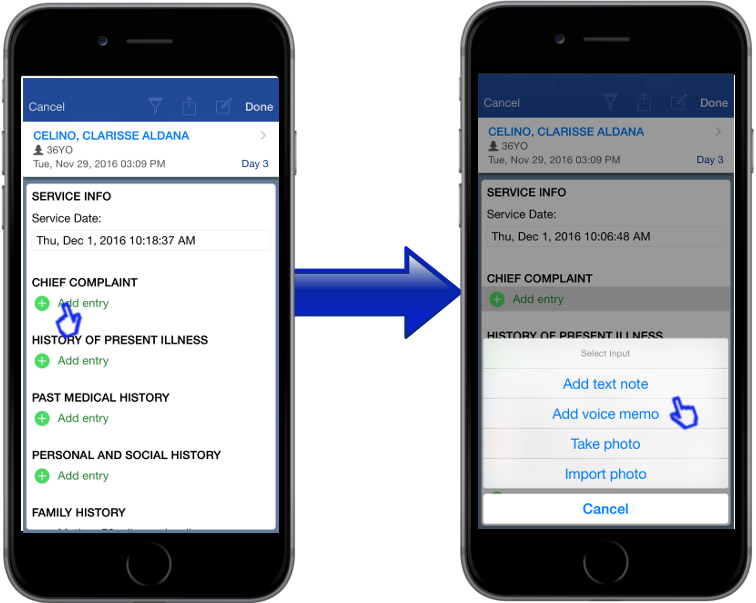
For text note, type your notes then tap [Done]. You can easily enter text notes using Apple Siri Voice to Text. Just tap on the microphone on the keyboard then speak into your device in a regular manner. Don’t speak to slowly or too quickly. Tap on the text when done and you can edit any corrections using the keyboard. Apple Siri automatic transcription gets better if you regularly use the voice to text feature.
For the voice memo, to start your dictation click the button on the lower right side. Click the lower left side to end your dictation. To playback your dictation, click on the play button. And finally, tap [Done] to save your dictation. You can have an assistant transcribe your voice memos by using the TranscribeME web application.
Step 4
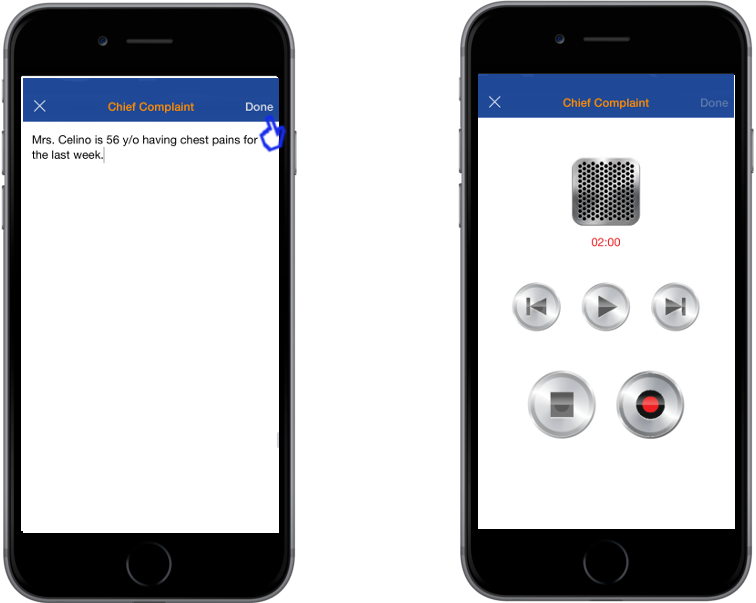
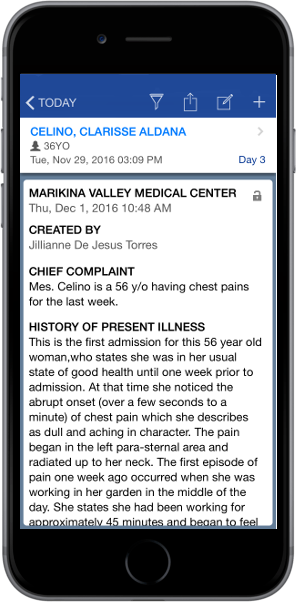
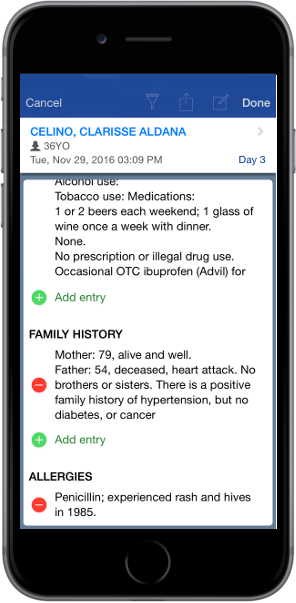
You now have your patient’s notes.
To edit, just tap on the notes and make the necessary changes.
To delete, just click the [-] then click delete.
Step 5
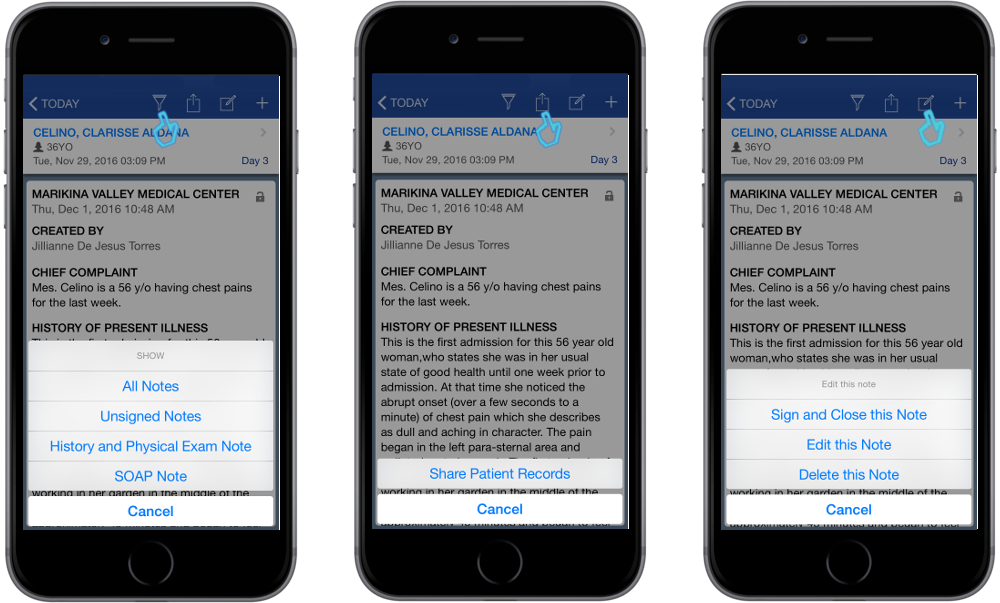
You also have the option to filter and see your notes by all notes, by unsigned notes, by history and Physical exam notes and by SOAP notes. Just click on the filter icon and choose.
Tap on the share icon to share patient’s record to other doctors.
And finally, click on the edit icon to sign and close, edit and delete notes.
Creating SOAP Note
Step 1
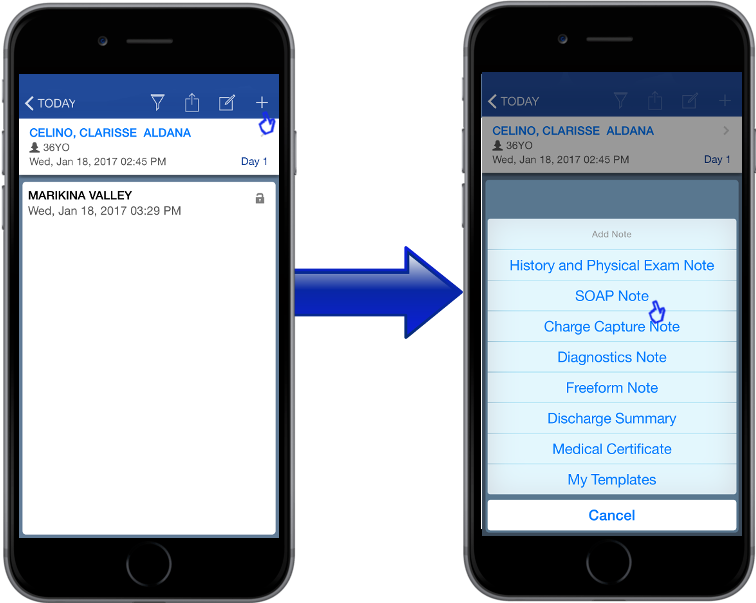
To create patient’s SOAP note, tap on the [+] and click SOAP Note.
Step 2
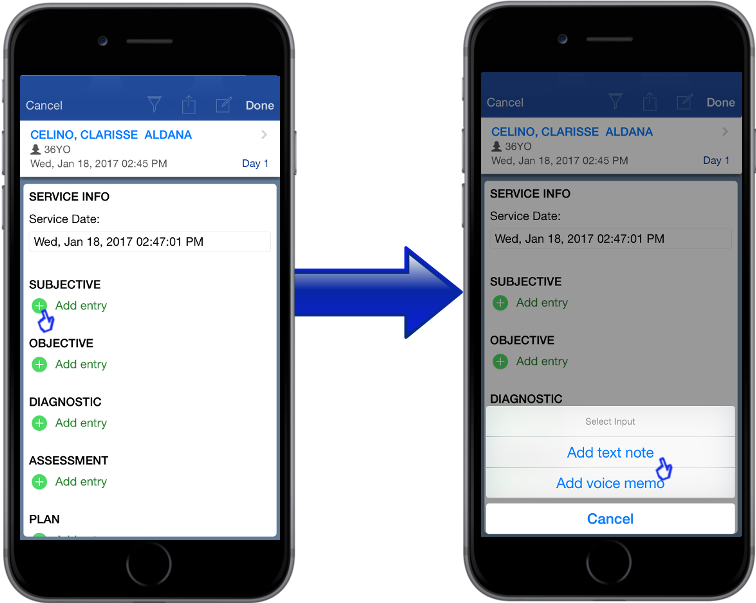
To create SOAP notes tap on the [ + Add entry ]. You can create notes by clicking Add text note or voice memo.
Step 3
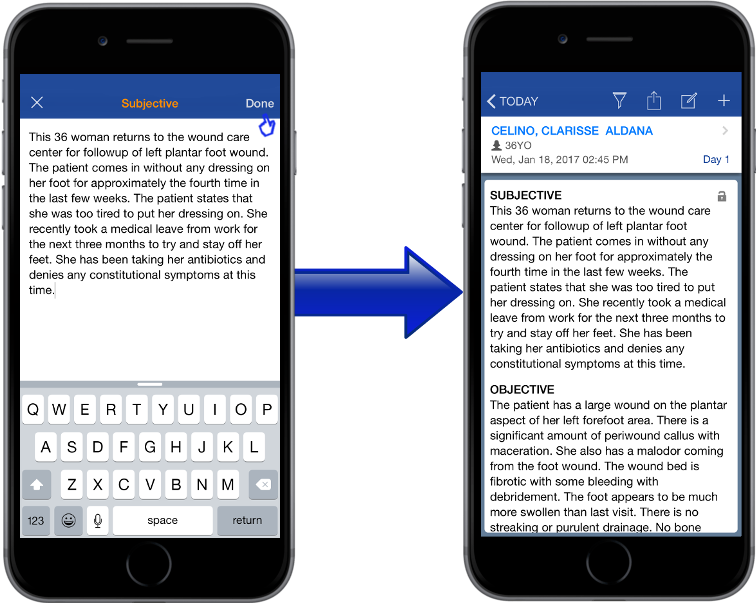
Continue creating notes by clicking [+ Add entry] then tap [done] to save it.
You have created your patient’s Soap Note.
For the voice memo, to start your dictation click the button on the lower right side. Click the lower left side to end your dictation. To playback your dictation, click on the play button. And finally, tap [Done] to save your dictation.
Creating Charge Capture Note
Step 1
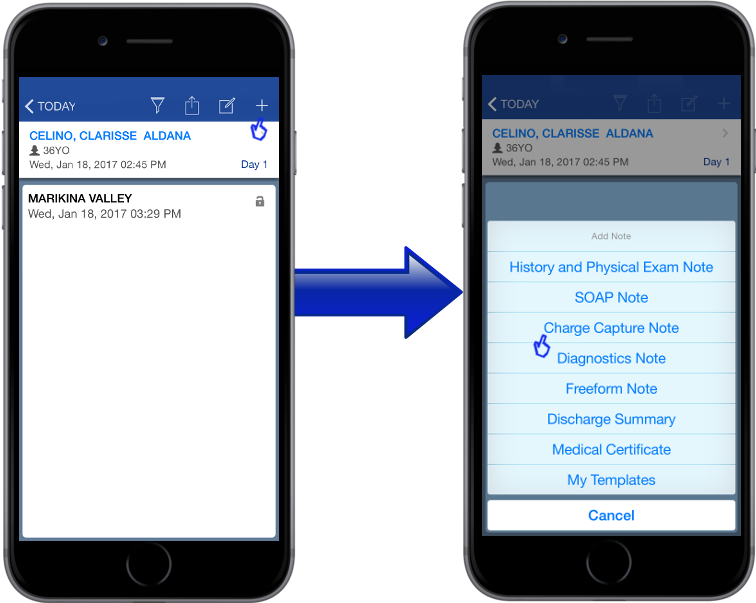
To create charge capture note, tap on the [+] and click Charge Capture Note.
Step 2
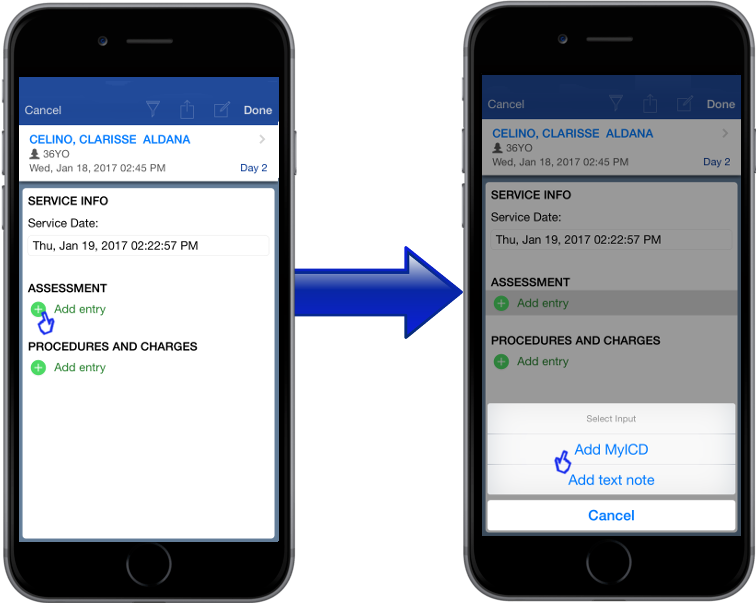
To create assessment, tap the [ + Add entry ].
You can add by clicking the Add MyICD or Text note.
Step 3
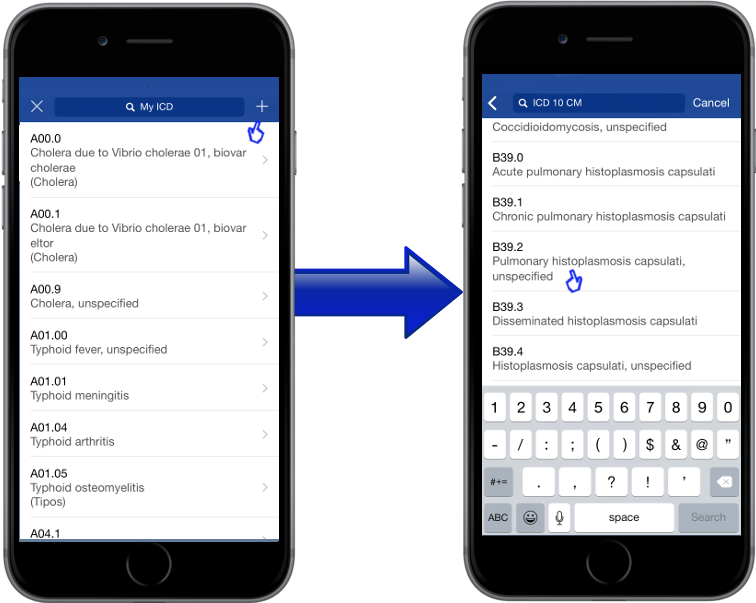
You can choose from the list of your favorites or commonly used ICD. if its not on your list just tap the [+].
Choose from the ICD 10 list and click it.
Step 4
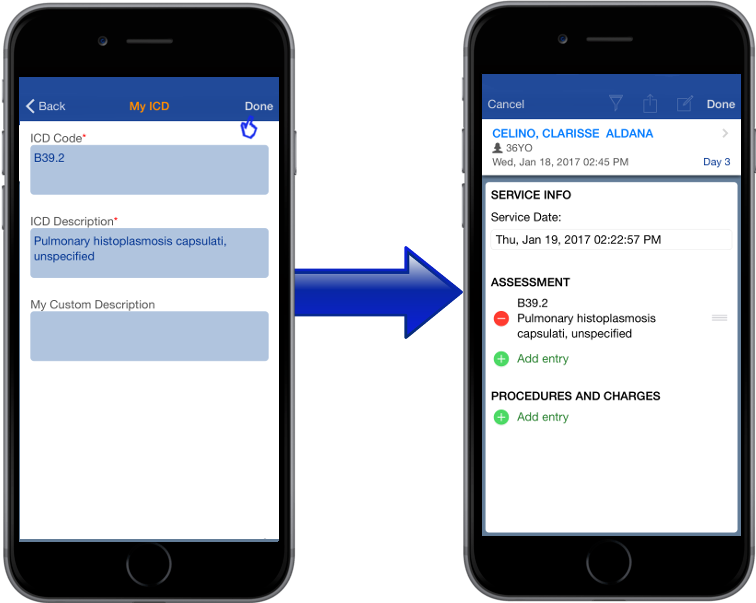
It will show you the ICD code and the description to save it just tap [Done].
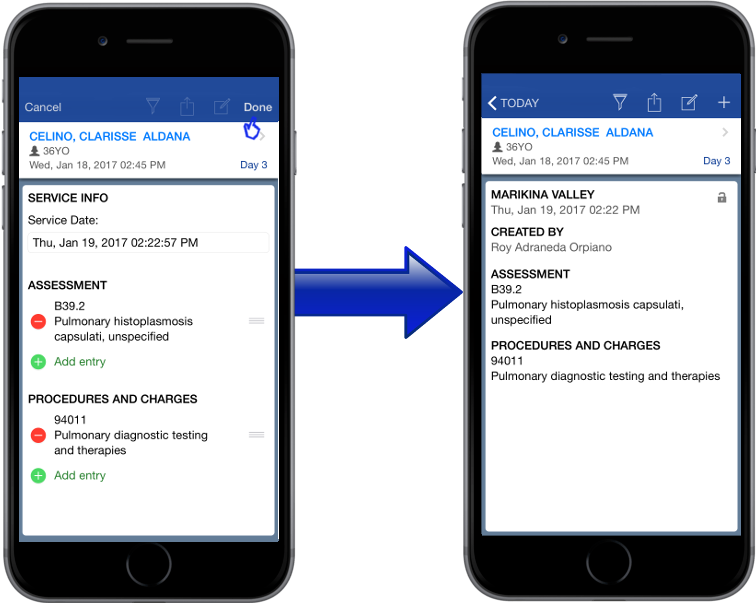
You have created your first assesment.
Step 5
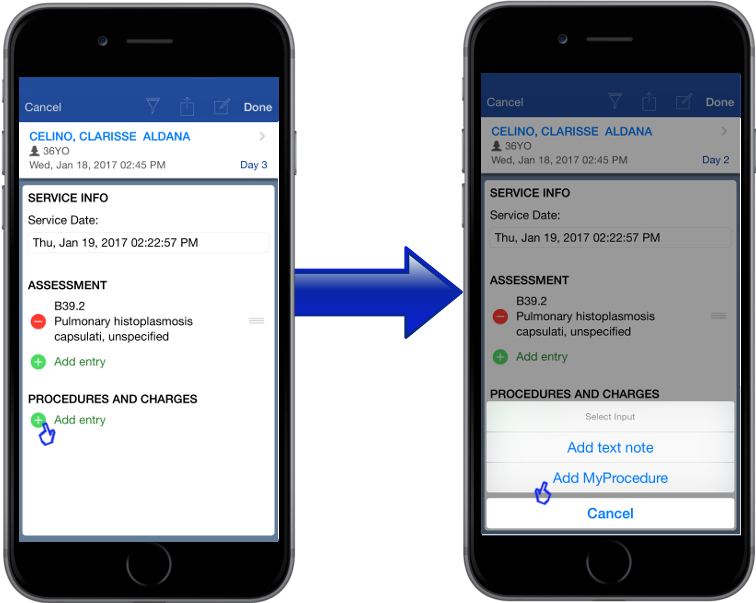
To add procedure and charges, click [+ Add entry].
You can add text note or choose from your My Procedure.
Step 6
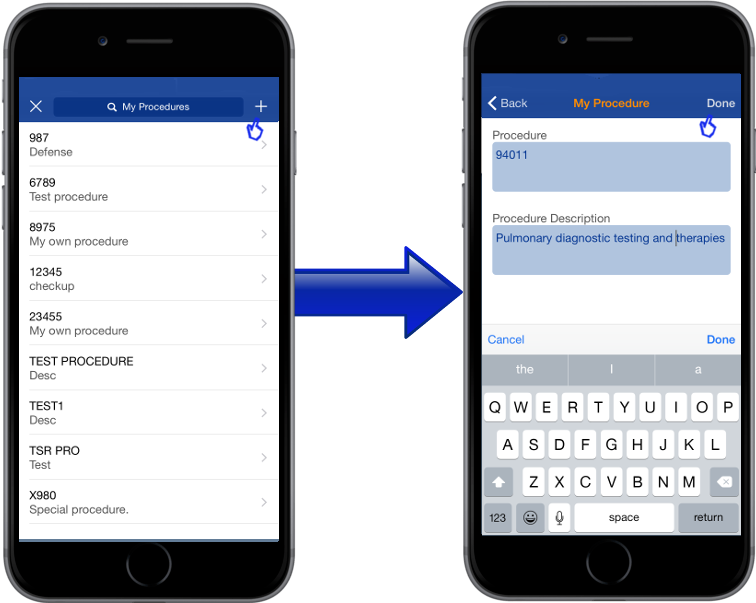
You can choose from the list of your My Procedures. if its not on your list just tap the [+].
Type the CPT code and the procedure description then tap [Done].
Step 7
Tap [Done] again to save your charge notes.
Creating Diagnostics Note
Step 1
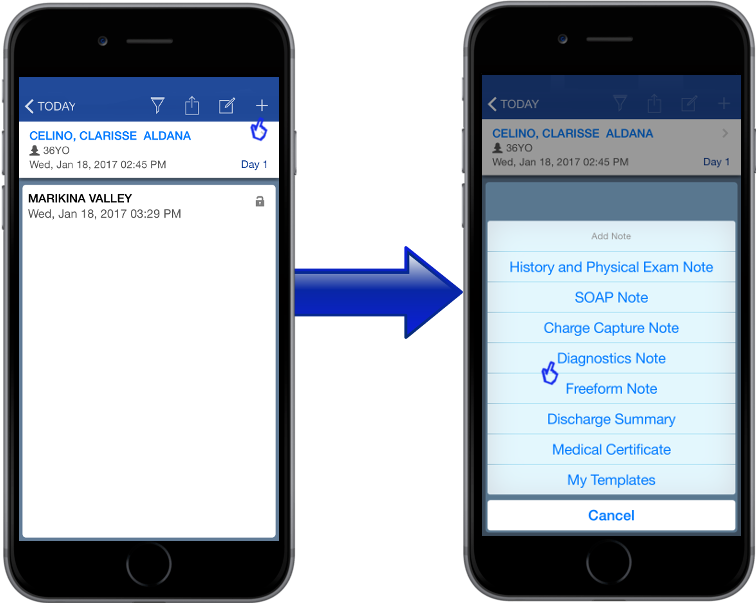
Tap on the [+] to create a note.
Then click the Diagnostic Note.
Step 2
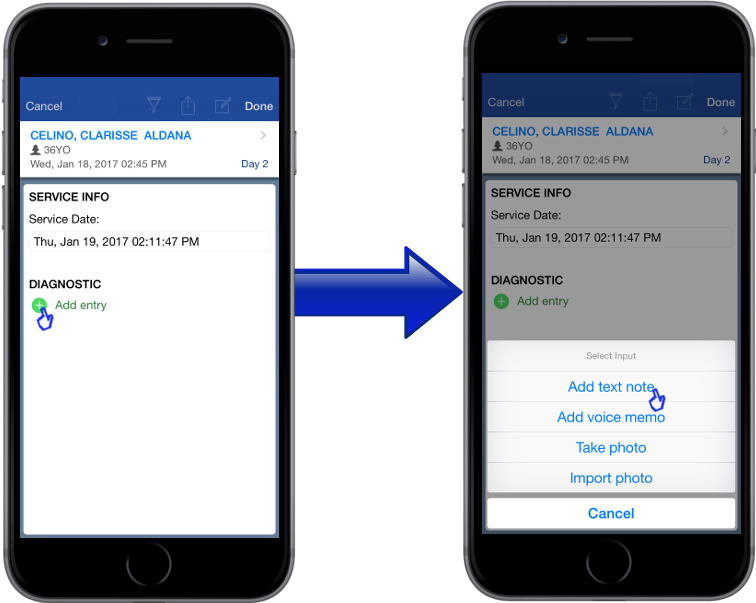
Click the [+] to add entry.
Click the Add text note.
You can also add voice memo and add a photo by taking photo or importing photo.
Step 3
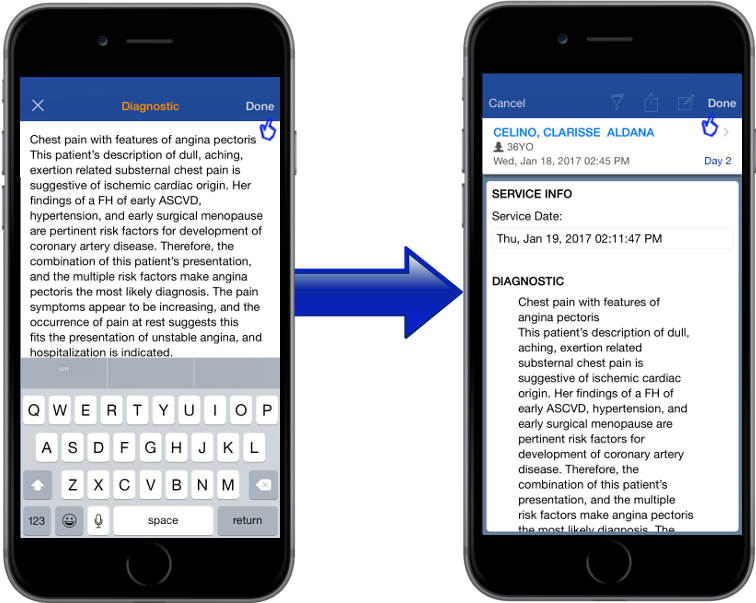
Type your note then click [Done].
Your note will be added to your Patient’s record and to save it, click [Done].
Step 4
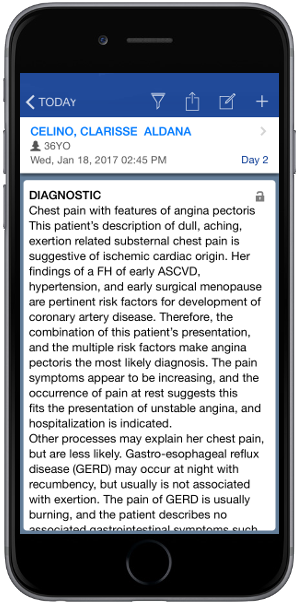
You have now created and saved your Diagnostic note.
Creating Freeform Note
Step 1
Tap on the [+] to create a note.
Then click the Freeform Note.

Step 2
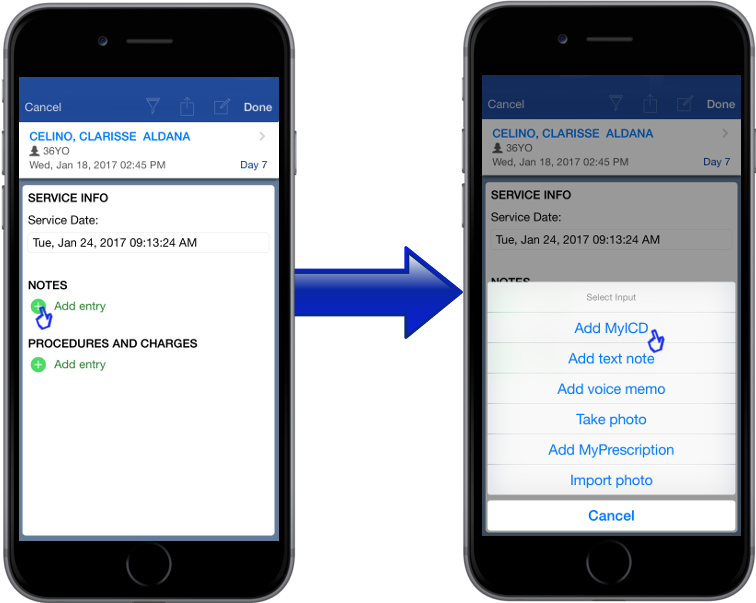
Click the [+] to add entry.
Choose from the given options. In this case, I will use the [Add my ICD].
Step 3
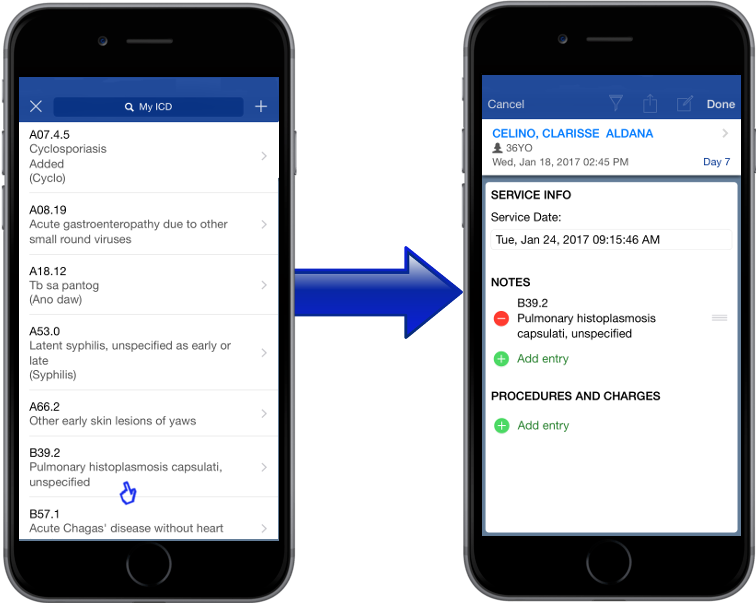
Choose from your list of ICD and click it.
Step 4
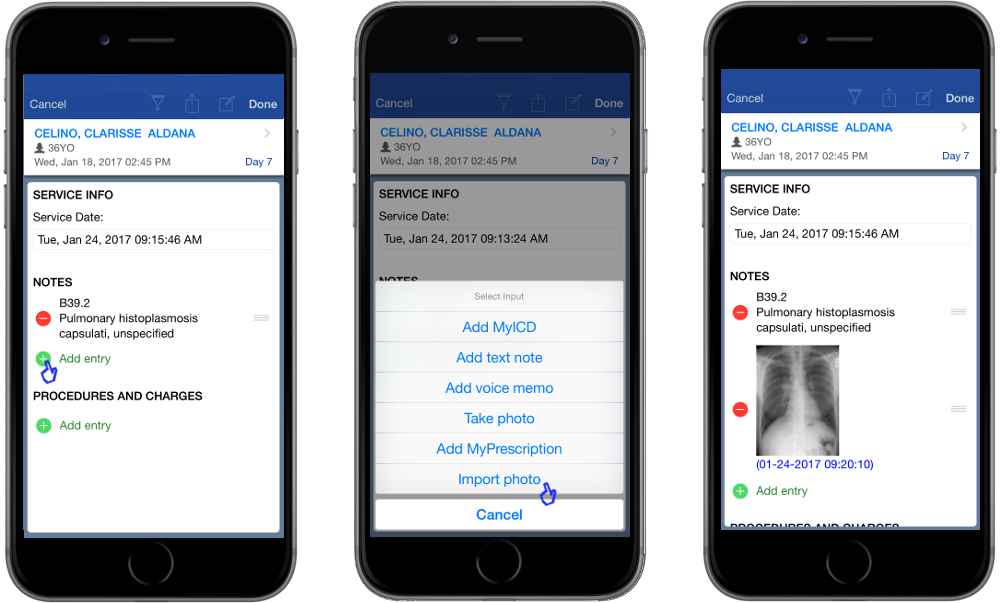
To add another entry, click the [+ Add Entry] again.
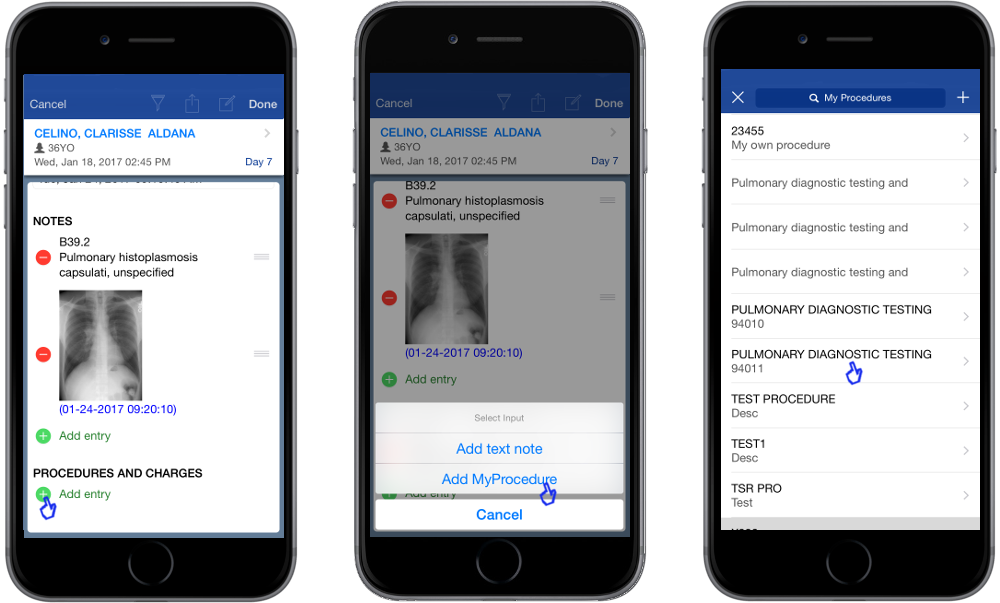
This time, I want to insert the patient’s xray. Click on [Take a photo] or [Import photo] if its already on your gallery.
Step 5
To create procedures and charges click [+ Add entry].
Click on [Add MyProcedure] then choose from your list.
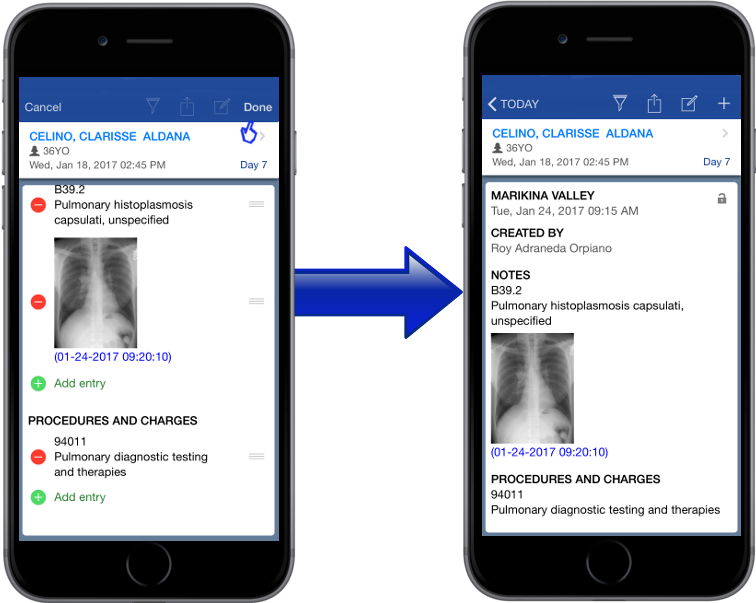
Step 6
To save all the notes you’ve created just tap [Done].
Creating Discharge Summary
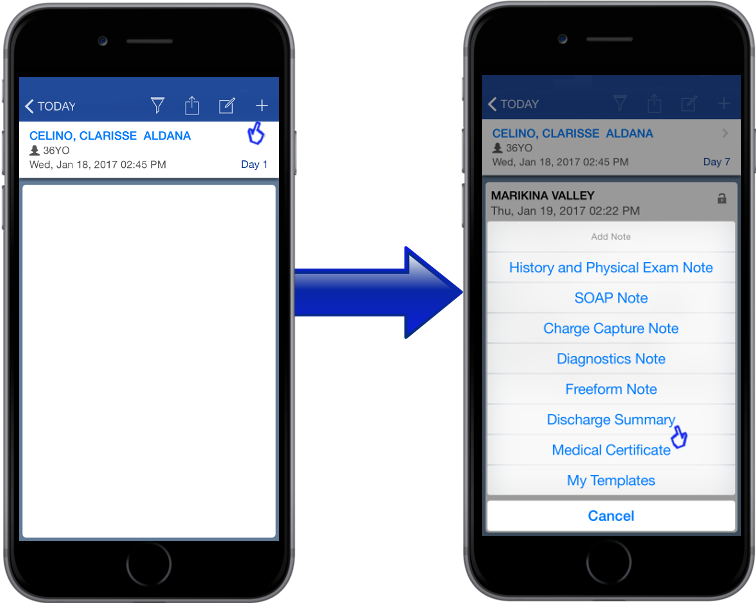
Step 1
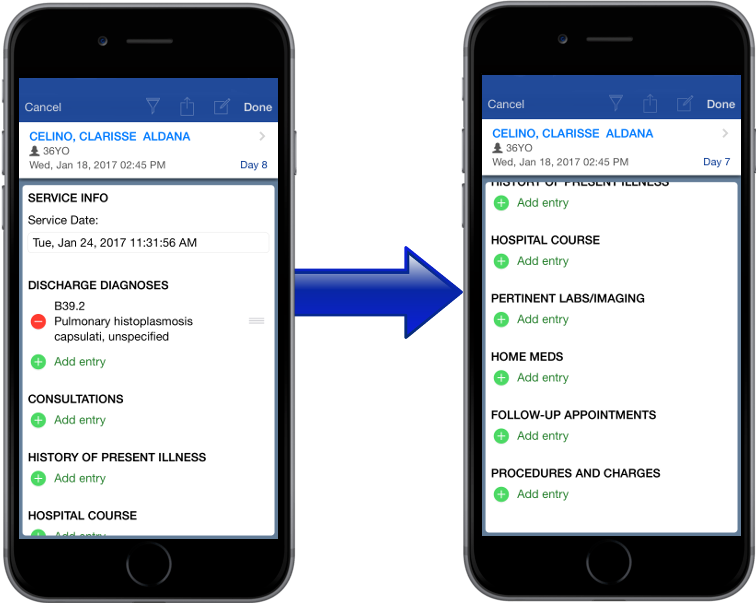
To create discharge summary, tap on the [+] and click [Discharge Summary].
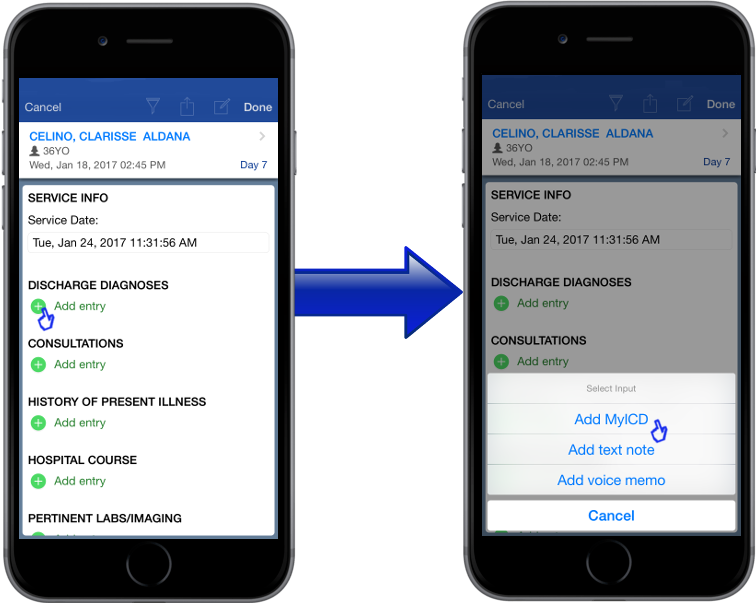
Step 2
To add notes tap on the [ + Add entry ]. You can choose how you will create your notes but in this case, I will use and click [Add MyICD].
Step 3
Continue creating notes by clicking [+ Add entry] and tap done to save your notes.+
Step 4
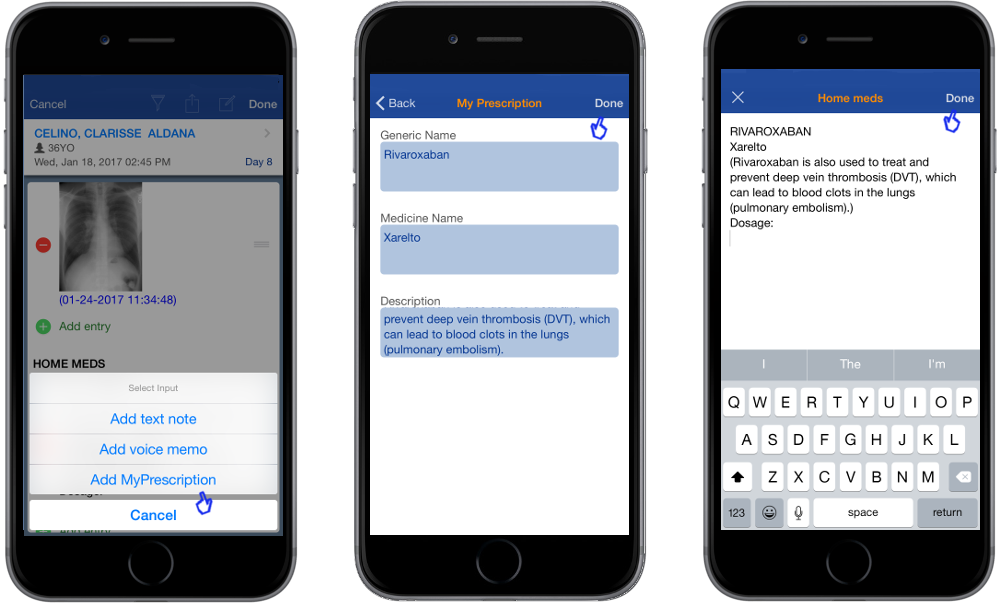
You also have [Add Myprescription] option. To use it click [Add Myprescription] .
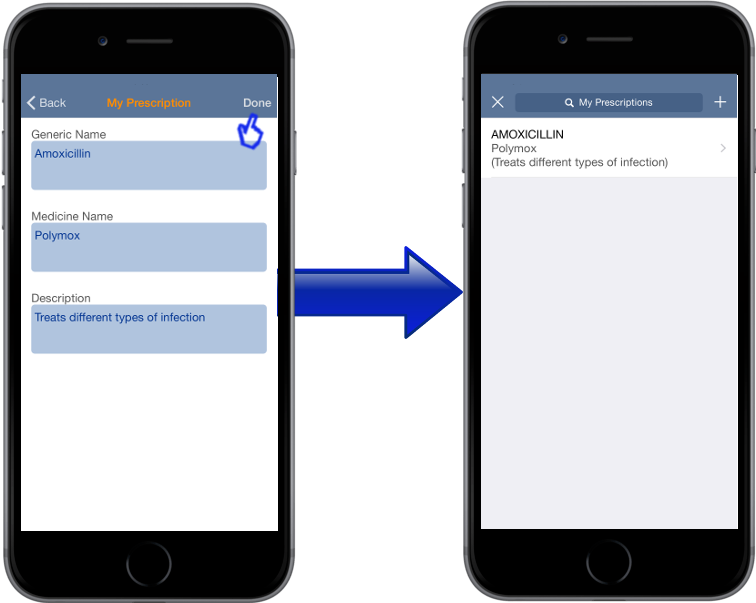
Type the generic name, medicine name and description and click [Done] to save it.
Step 5
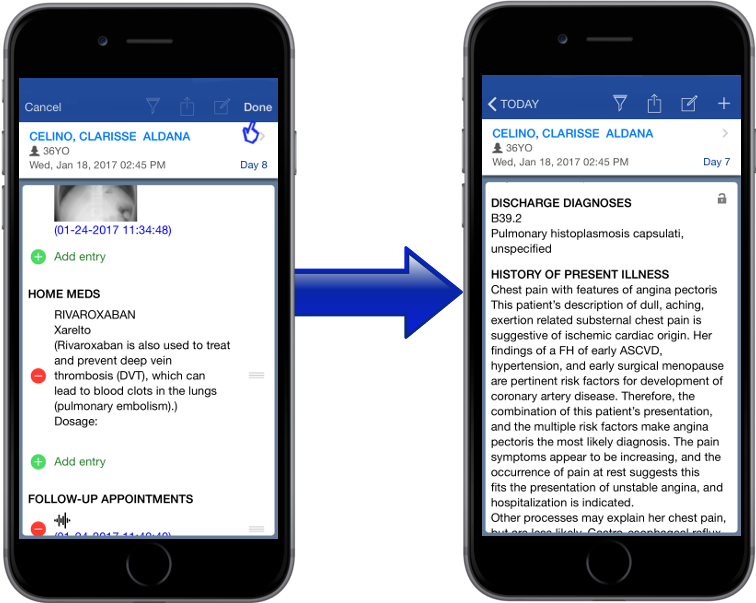
Save all your notes by clicking [Done] on the upper right part of the screen .
Your now done creating your discharge summary note.
My Favorites
Step 1
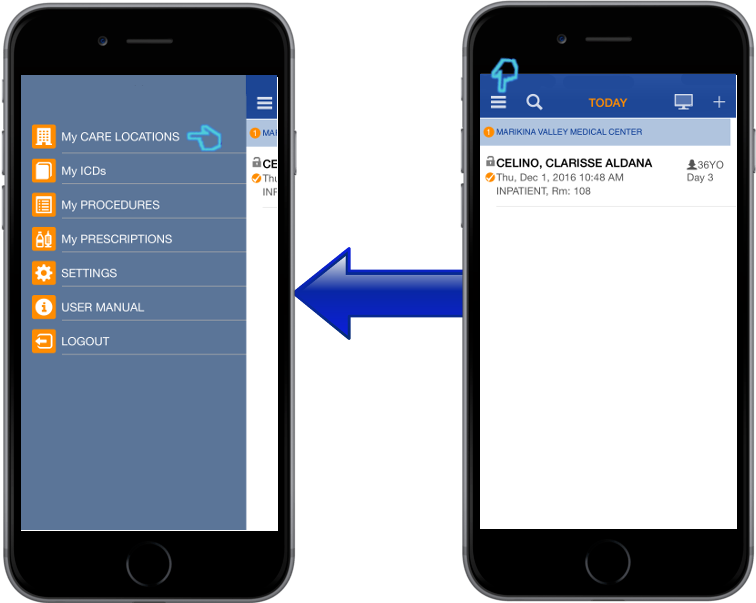
On the Patient List, you can tap on the Menu Icon on the left upper corner to access the menu and settings page.
From the menu and settings page, you can add Care Locations, and your commonly used entries for MyICD, My Procedures and My Prescriptions lists.
Step 2
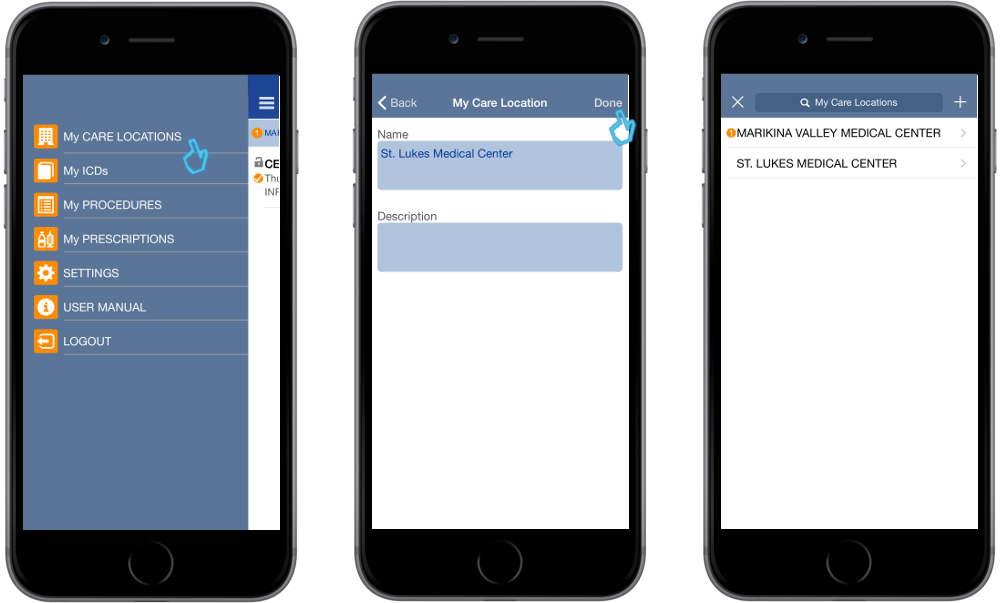
To add Care Location, tap on the [My Care Location ]. You may add the hospital name and a short description then tap [Done].
You have now added a new Care location on your My Care Location.
Note that the hospital name or clinic name is set by the user so if a patient is shared with another doctor, unless the hospital is spelled exactly alike, the location of a shared patient may result in another location being created.
Step 3
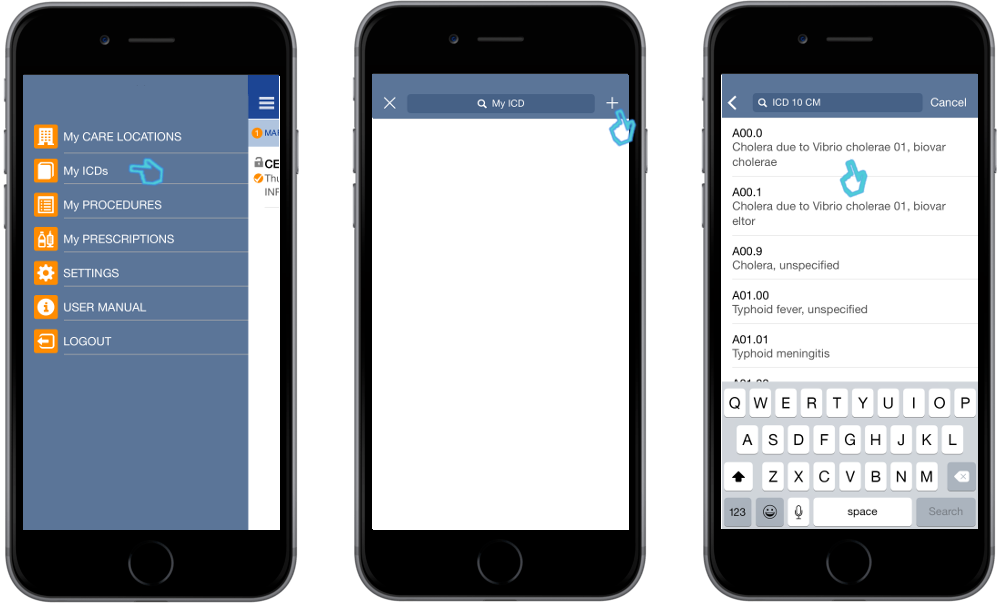
When adding an ICD10 code,tap the [My ICDs] from the main menu. tapping the [+] button will bring you to the complete ICD10 list. You may select the ICD10 codes that you commonly use.
NOTE: DRNotes is not meant to be a diagnostic application so we recommend you use a separate app or the free ICD10 search tool of the WHO if you cannot locate an ICD10 code or are not familiar with the exact disease description used by ICD10.
Step 4
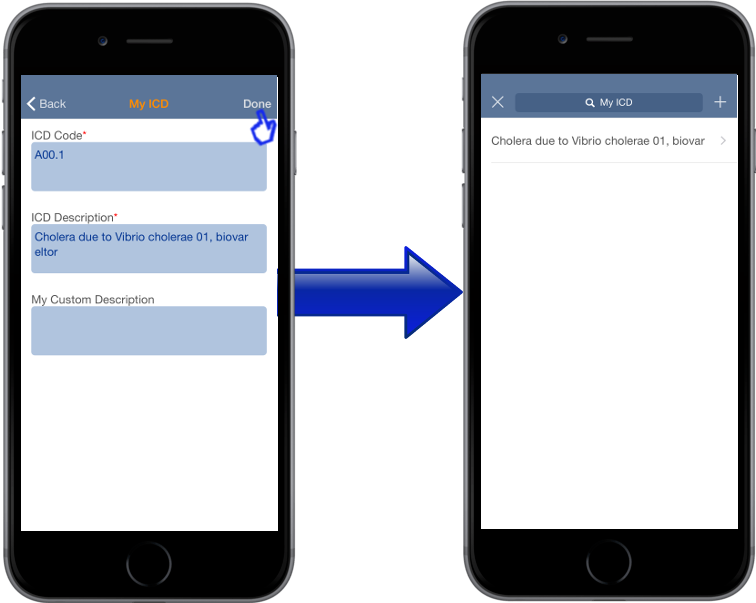
After selecting the ICD10 code you commonly use, tap [Done].
You have now created a list of you Favorite or commonly used ICD10.
Step 5
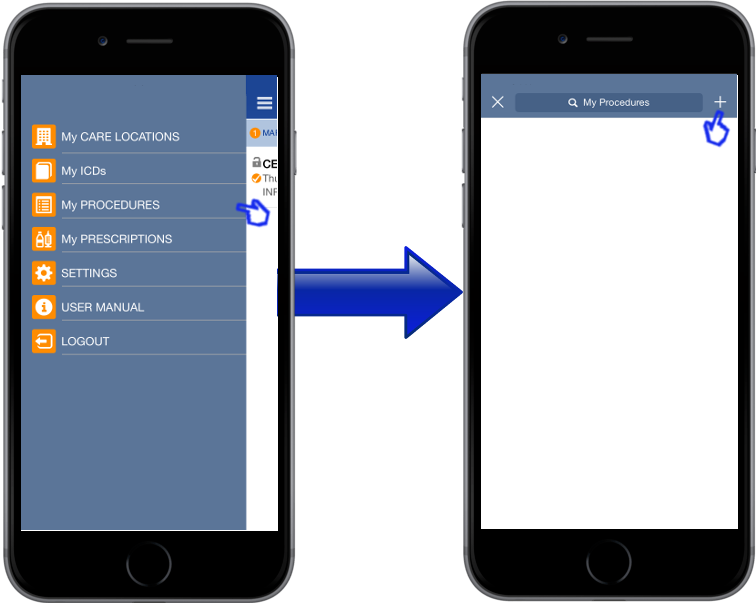
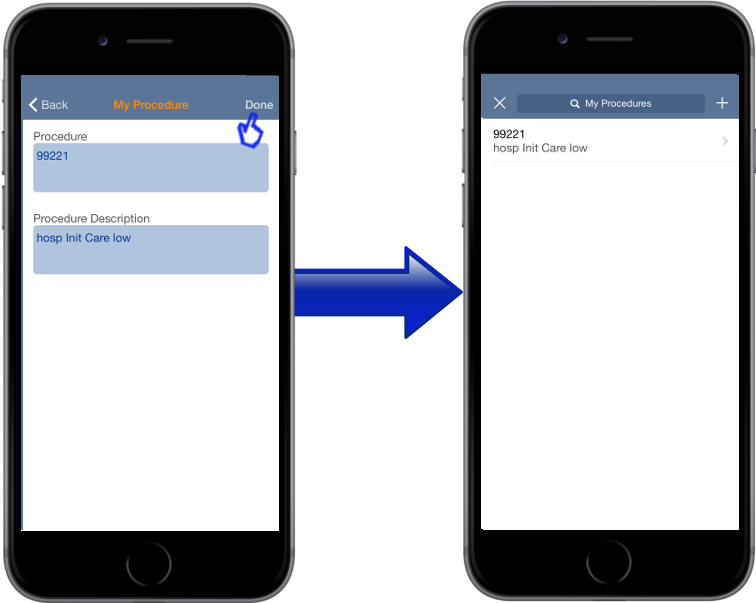
Procedure codes may also be added to facilitate the capture of commonly used procedures.
To add procedure, tap on the [My Procedures] from the main menu then tap the [+].
Step 6
Select the commonly used procedure and click [Done].
You have now added a new procedure to your My Procedures list.
Step 7
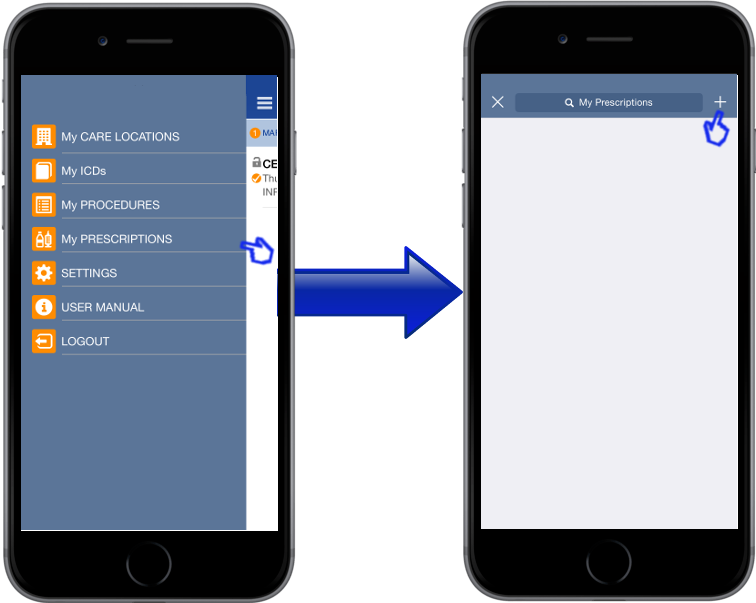
Commonly used prescription medications may also be added to the My Prescriptions list. When a medicine is selected, a data entry box for the dosage amount will be displayed. You may add the dosage by text entry.
To add prescription, tap the [My Prescription] on the main menu then tap [+].
Step 8
Type the generic name, medicine name and description then tap [Done].
You have now added a new prescription to your My Prescription list.
